Get ideas & inspirations delivered to your inbox. You won't want to miss a thing, so subscribe free to the Blog Feed or sign up for Free Email Updates on the latest projects, shop news, blog tutorials & more. Check out the Project Gallery, Garden, Recipes & Inspirations tabs above, to see what you have missed. Browse through the sidebar for this week's Popular Posts!
**Please note: Some links may be broken, if this happens, please let me know which post & search for the title of a post on the search tab on the right while I work on fixing the problem.---->

Tree Classics: Kennedy Fir Narrow Christmas Tree

*Disclosure: Tree Classics Sponsored the item on this post.  All views and opinions expressed are my honest 100% opinion.
www.inspirationsbyd.blogspot.com
I’m excited to have a Tree Classics Christmas Tree this year to review, it is their Kennedy Fir Narrow Christmas Tree. When Tree Classics asked if I would consider reviewing their Kennedy Fir Narrow Tree, I was thrilled to do so.  I was not sure what to expect, but I did know that the tree was going to be pre-lit. I also wanted to know if it was going to be of good quality, and it is.

The Kennedy Fir Narrow Christmas tree is beautifully designed with a combination of life-like, real feel (PE) tips on the outside and PVC needles in the inside that give it a lush appearance of a genuine tree. The branches slightly descend to create a lovely scene that draws everyone together to view the glowing lights that create a starlit effect. The tree I received measures 7 1/2 feet tall and 42 inches in width. It features a light connection for each section toward the middle of the tree. It has bright green real feel foliage and hinged branches for easy setup. The tree comes with a sturdy metal stand with extra bulbs and fuses. Tree Classics also offers Color Changing LED lights on their trees.
unboxing tree
unboxing chrismas tree
www.inspirationsbyd.blogspot.com

Tree Classics was very prompt in their delivery. When the box arrived, it looked sturdy and was in good condition. I opened the box and the tree was wrapped in bubble wrap to protect the bulbs during shipment. The tree arrived in three sections, the top, the middle, and the bottom and included the stand. It was very easy to assemble because it is narrow and the lights may be plugged inside by the trunk. I was pretty skeptical about having a pre-lit tree considering that I’ve had one many years ago and once they burned out, that was it. But according to Tree Classics description page, if one light goes off, the rest remain lit. The cord includes an on and off switch located toward the bottom. The tree arrived with plenty of extra bulbs and fuses if replacements are needed.  I was unsure of the diameter of the tree since I have never had a narrow tree before, but for the space I needed, the tree is a perfect size. I love the width! As I continued fluffing the tree, I was not sure how I felt about the PVC needles in the inside but to my convenience, since the needles are flexible, they served well for holding the decorative ribbon in place and make the tree look full. The PE tips have a realistic look and feel that hide the PVC branches. In the past, I have had real trees, so the fact that the tips of this tree are realistic is wonderful. I love that there are no needles on the floor and that I do not have to water it. The only thing missing would be the fragrance of a real tree, but a scented stick from my Young Living collection does the trick.
Tree Classics

It was easy to decorate, I used simple snowflakes, glass ornaments, white branches, mesh ribbon and a few handmade ornaments.
This tree is perfect for small spaces, and for those who do not want to deal with the mess of a real tree but want to keep the look as realistic as possible. This tree works well for those who may want more than one tree, perhaps for a dining room, bedroom, office or playroom where space may be limited. It is perfect for people in apartments or those lacking storage space, this tree will not take up as much storage as a larger tree would. It is the perfect space saver.
www.inspirationsbyd.blogspot.com

This year the tree turned out just perfect for this space. It looks gorgeous and it is so pretty from the outside by the window. I personally love this tree and all its conveniences. I am pleased with my Kennedy Fir Narrow Tree. Thank you, Tree Classics. Tree Classics is an extraordinary company with great customer service. I recommend their trees for your Christmas Holiday!

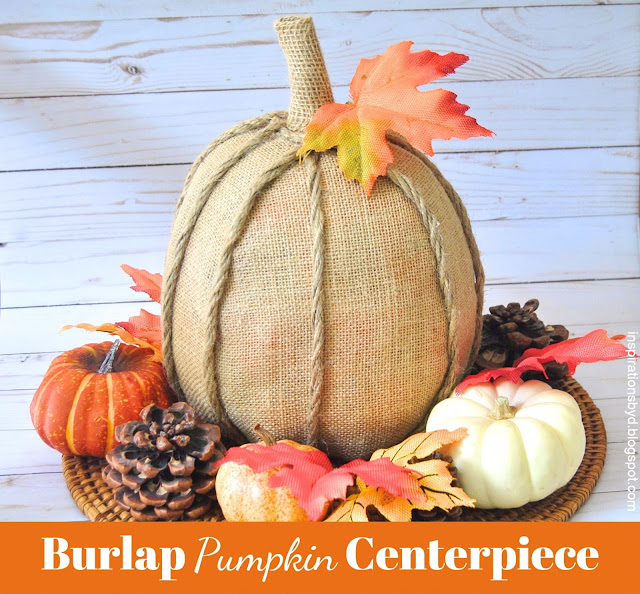
How to Make a Burlap Pumpkin Centerpiece


www.inspirationsbyd.blogspot.com

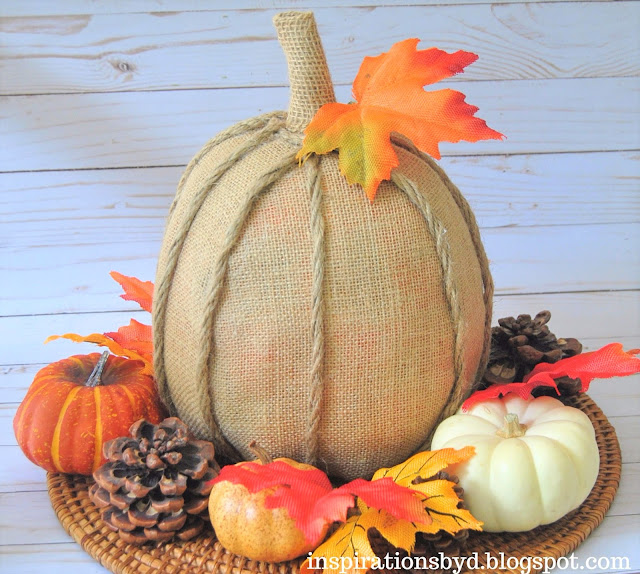
 I love to bring Autumn decor into the home especially when it does not feel like it outside.  I decided to repurpose an old Jack O' Lantern and turn it into a Fall Burlap Pumpkin Centerpiece for my dining table to give it a Harvest touch.  I don't go overboard in decorating, but instead prefer to keep things simple, a wreath on the door and a centerpiece works well.  I believe that it will look inviting until Thanksgiving and it cost me nothing except a little time.

So why not add a little fall flair to your home?  A simple pumpkin on a table is enough to give it Fall character. This centerpiece adds color, texture and both natural and faux elements, for that Autumn style that you may keep around until Thanksgiving. Now I am aware that the orange is visible, but you may line your pumpkin underneath the burlap for extra cover.  I don't mind the orange.

What inspired me to make this pumpkin was a similar centerpiece at a store which sold out and I wanted one for my dining table, so I just made my own version.

I already had everything I needed on hand.  I used an old jack o’ lantern that I no longer used
and that was where I began. So for this project, you will need:

  • A faux pumpkin, old or new, whatever you wish
  • burlap fabric
  • a piece of burlap ribbon, if you have one on hand, if not, you may use a faux or real pumpkin stem
  • scissors
  • hot glue gun and glue
  • push pins
  • roll of jute string
  • faux leaves & florals
  • (Optional) little pumpkins and pine cones
 I started by taping off the carving on the pumpkin, the eyes, nose, and mouth with neutral craft tape.
Then I removed the wire and bulb from the inside of the pumpkin that was used to light it up.
Next, I cut strips of burlap fabric 6 inches wide.  I used push pins to hold the fabric in place before gluing anything.  I wanted to make sure I had enough fabric and that it sat well on the pumpkin.

You have the option of lining your pumpkin before adding the burlap so that it is well covered.
I did not do that with my pumpkin so you may see a glimpse of the orange underneath.
It is not very noticeable in person.

The pumpkin has an opening in the bottom, so I used that opening to tuck the fabric underneath and
hold the fabric in place with push pins.  I cut off any excess fabric.
  www.inspirationsbyd.blogspot.com

www.inspirationsbyd.blogspot.com

As I continued to cover the pumpkin with the burlap, I made sure to fold clean edges as seen below when I overlapped the fabric, but I left the other side unfolded since it will be covered by the next strip of fabric. This will serve as a guide to glue the string later on.
www.inspirationsbyd.blogspot.com

I continued to cover the pumpkin strip by strip and overlapped the previous strip carefully. Below you can see how the fabric was held in place on the top with push pins and the folded edges on the sides.
Don't worry about the rough edges on the top, that will be covered with the string as well.
www.inspirationsbyd.blogspot.com
DSC_1922

For the last strip, I folded both sides of the fabric as seen below to give it a clean finish and held it in place with more push pins.  I made sure everything was nice and tucked underneath the pumpkin.
www.inspirationsbyd.blogspot.com

When the fabric was as I wanted it, nice and tucked, I began to hot glue the edge of the burlap as seen below.  At this point, I had not removed the push pins but kept them in place until all the side edges were glued.  Once the edges were glued, I began gluing the top part of the fabric by the stem carefully. Then I hot glued the fabric underneath but kept the pushpins under the pumpkin for extra hold.

After the glue was set and dry, I grabbed by jute strings; since they were thin I had to make it thicker so I twisted four pieces of string together and tied the top into a knot to keep it in place.  Before cutting my string, I measured how long the string had to be to cover the edges of the burlap fabric from top to bottom.  In my case, I used about 13 inches per edge.
www.inspirationsbyd.blogspot.com

I hot glued the knot part of the string to the underside of the pumpkin as seen here. I made sure it was set before continuing. Then I twisted the string and glued it to the folded edges of the burlap, I worked my way up to the top of the pumpkin. When I reached the top of the pumpkin, I twisted and glued the remaining string around the top edge of the fabric around the pumpkin's stem. I repeated this step for all the edges on the burlap.
www.inspirationsbyd.blogspot.com

Here you can see how I twisted the string around the stem, leaving the stem exposed.
www.inspirationsbyd.blogspot.com

When all the edges had been covered with the string as well as the edge on the top around the stem,
I used a piece of burlap ribbon I had on hand to create a longer stem for my pumpkin. I folded the ribbon in half and rolled it to form a stem, I then hot glued it to seal the seam. After the seam was dry, I tucked it over the existing stem and hot glued it around the edges, under the string surrounding the original pumpkin stem.
www.inspirationsbyd.blogspot.com

You can see here how it is tucked in under the string. That was it, I had my burlap pumpkin ready to add a little color with faux leaves and real pinecones around it with small pumpkins.  I will probably add some flowers later on, but for now, this will do.  You may use the Burlap Pumpkin for any area in your home, table, mantel or by the window, it's up to you.

I hope that you have enjoyed this Fall Craft.

www.inspirationsbyd.blogspot.com

www.inspirationsbyd.blogspot.com

www.inspirationsbyd.blogspot.com

Happy Crafting!

Linked to:
TipJunkie
BloggyMoms

Welcome Fall with Handmade Decor

Our Traditions
It's Fall and I am feeling a little of that cool air that I have been missing for the past year.
Yet it is still not the time for sweaters, but what I am able to do to remind myself of
the Fall weather that I crave so much is to look for Autumn inspired items to think about this season.  
I have also been crafting little things here and there that I will soon share.

It has been a while since I have given my fellow handmade artisans some recognition on the blog.
I've selected only a few to feature on today's post. All items are Fall themed, so check them out, visit their sites and support them if you can.  Click on the captions to get to their sites.

I hope that you enjoy viewing the selected few. You may also visit the artisans that were featured on this post and this post.  Let me know which are your favorites. Happy Autumn!

LuccaLuCreations (Etsy)
CurtisandFoster (Etsy)
BlueSkyWhimsy (Etsy)
JuJuBeeGoods (Etsy)
KitchStudios (Etsy)
KitcchStudios (Etsy)
DWLstudio (Etsy)

Inspire Your Art (Etsy)


The Brave Little Tailor (Etsy)


Thank you for stopping by and I hope that you have enjoyed the decor inspirations!
For more Fall Ideas visit this post!

Country Sampler Autumn Decorating


The 2017 issue of Country Sampler Autumn Decorating provides cozy ways to give 
your home a beautiful seasonal welcome. Tour fabulous fall homes & discover 
how to dress your rooms in fall style and get creative with 100+ DIY projects.

In this issue, they have featured our Book Page Fall Wreath and that is exciting!
I hope that you will pick up a copy and check out all the fall decor ideas in this issue.
Sometimes all it takes to bring in a fall look is to update your existing home decor by 
adding touches of silk fall leaves or fall foliage from your own front yard.  

This is not a promotion, I simply wanted to share with my wonderful readers all the lovely
fall ideas including my wreath in this current issue.  I hope that you get your copy
and enjoy all the wonderful ideas featured.  

Thank you for your support!


Essential Oils


I know that by now many of you have noticed the essential oils fuss online and now out in the market near you. When I came across the essential oil craze, I was curious about why they were so popular.  I have seen oils in the past, but never knew anyone who used them except for aroma benefits and DIY ideas.  As I dug a little, I met Wellness Advocates and Distributors of a few essential oil companies.  The information that I gathered was pretty interesting, even too good to be true in some cases, so I kept digging.

I noticed that some of my friends were now using these oils as well.  When I asked them why they used them and what were the benefits they shared their experiences with me.  It was not until I received a sample blend that I actually tried these oils.

Please know that not all oils are the same.  You may purchase a $4 bottle at a store and get a pretty cheap version of oil and it will not serve for anything beneficial.  How do I know?  Well, I have tried them and can testify that not all oils are the same and that only a select few are worth your time, health, and money.

As I used the blend (oil mixture) given to me, I began to notice the benefits of the oils.  I was in awe and could not believe how it was working. My bottle was finished and I wanted more for my family. I tried three companies, and now I am down to one.  I have become a full-time member and have begun using many of their products in my home.  I have gotten rid of most of my store-bought products due to the harmful ingredients associated with them.  All you have to do is google the ingredients to any product in your home and you will see how much toxic ingredients they contain.  You may also download the app: Think dirty, shop clean; with this app, you may scan products to learn about their ingredients.  It's no wonder there are more illnesses today than many, many years ago, but I won't get into that right now.  My focus is on providing my family with a healthy alternative and living a healthy lifestyle.

The clean benefit is not the only blessing, but also a financial blessing as well.  You see, at first, I thought this is too expensive for me, there is just no way I will spend that amount on oils, but I did not make a purchase, I made an investment.  I made an investment in our health and in our lives.  I have been blessed to get my money back on my purchase by just sharing the benefits with others that were interested in a healthier version of products. Many do not see the chemicals that we put on our bodies and our children's bodies. The chemicals in products are part of the health problems that people are facing today along with their children. I cannot stress enough how important it is to take care of your bodies and how this may help you.  Simply by boosting your immune system naturally is a great help without chemicals. Not only that, but it has helped me maintain balance, peace of mind, and calmness during times of stress, anxiety.

Right now, I will share just a little of what essential oils are and will continue to share information as I continue with my journey using essential oils.

Essential Oils are nature's volatile aromatic compounds generated within the plant such as shrubs, flowers, trees, roots, bushes, seeds, or another source from which it is extracted through steam distillation, hydro-distillation, or cold-pressed extraction.

The power of essential oil lies in its constituents and their synergy.  Each essential oil is composed of 200- 500 different bio-constituents, which make them very diverse in their effects. No two oils are alike.

Some of the ways that I use Essential Oils below:
 (NOT store-bought):

Inhalation
You may inhale the essential oils right from the bottle or with a diffuser.  You will gain their health benefits simply by breathing in their aromatic scents.

Topically
You may apply essential oils anywhere to your exterior body, (not in your eyes or in your ears). Dilute the essential oils with a fatty oil such as coconut oil, V-6, Enhanced vegetable oil complex, olive oil, etc..It is not recommended to apply citrus oils to your skin if you will be exposed to the sun.

For more information on the chemistry and uses of essential oils from Young Living, I recommend visiting their website. If you want to become a member of the Young Living community, please Click Here for more information.

If you have any questions for me, please do not hesitate to contact me.  I will be more than happy to assist you. 


Pin It button on image hover